


Password-MFA Workflow
Introduction
This document talks about the process through which User Sign-Up and register itself in User database during first login attempt.
Before this the Client/Development team must have to perform the following tasks:
- 1. Create a project/select (an existing) project by logging into https://cripsa.com
- 2. Use the link got in the above tasks to call the Password-MFA login screen in the home page of the customer.
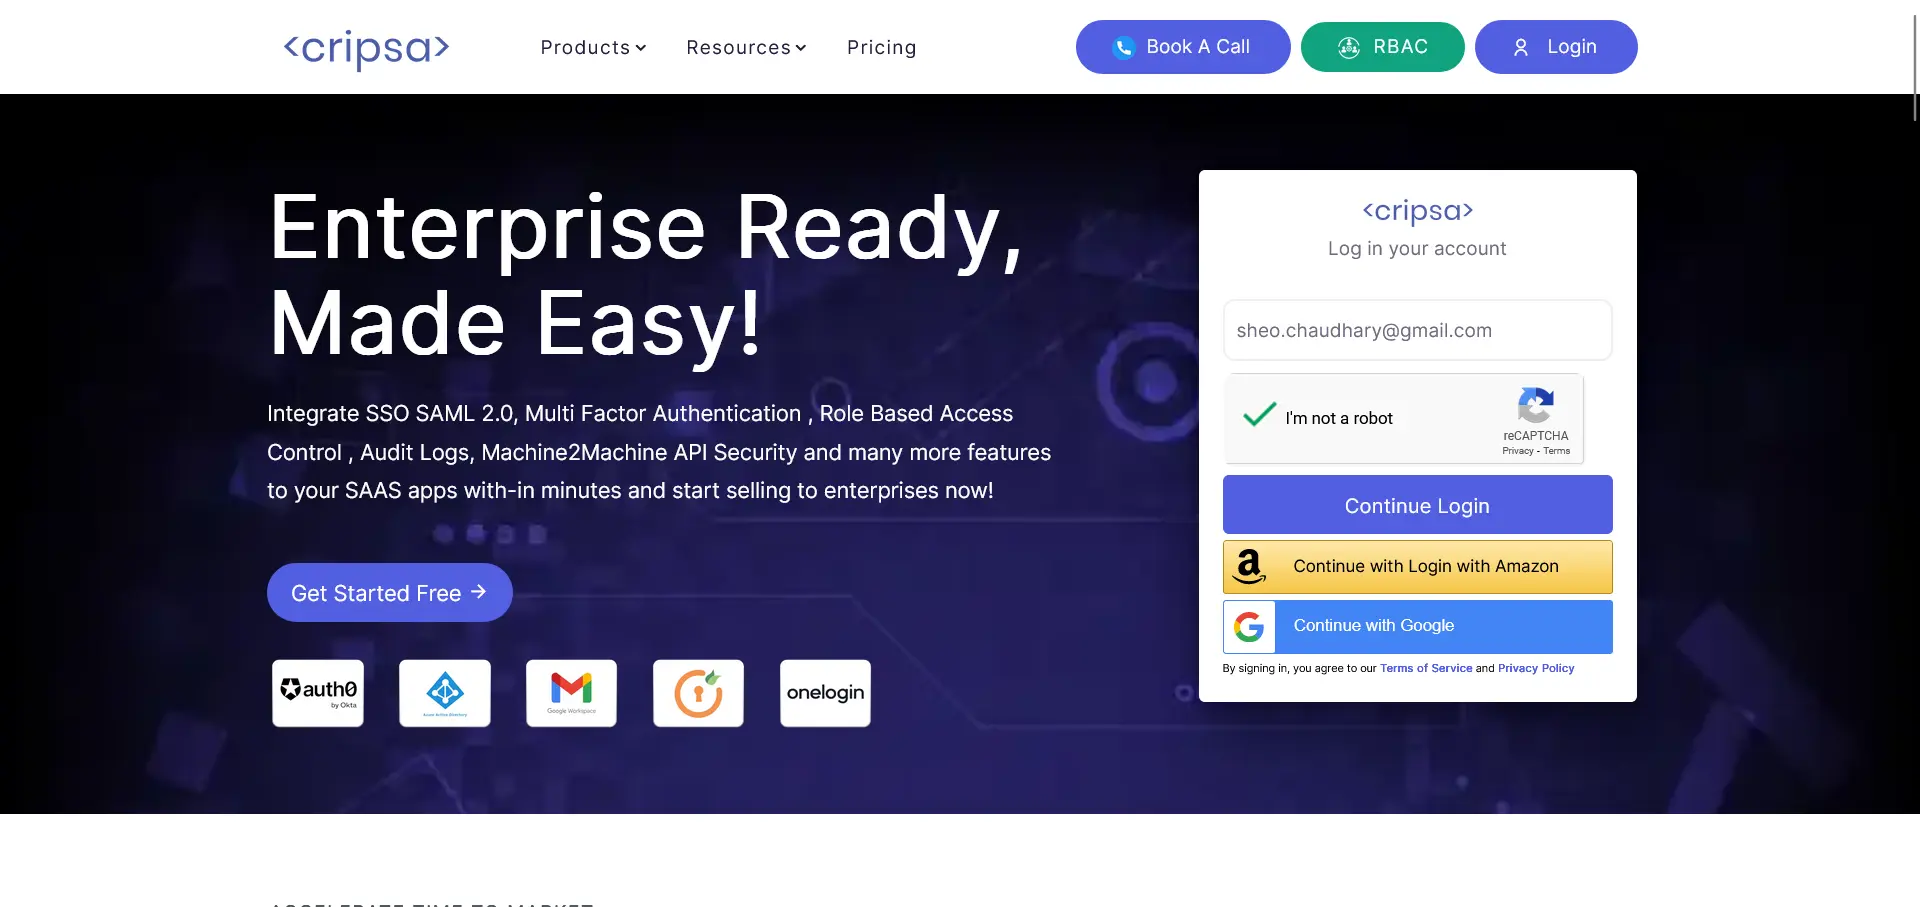
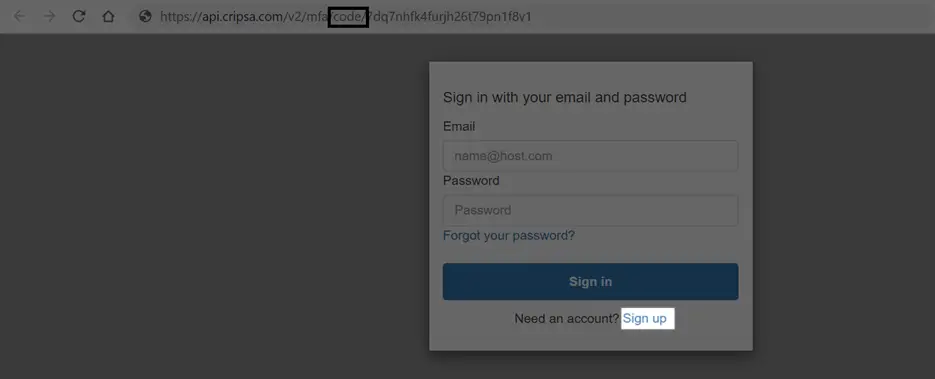
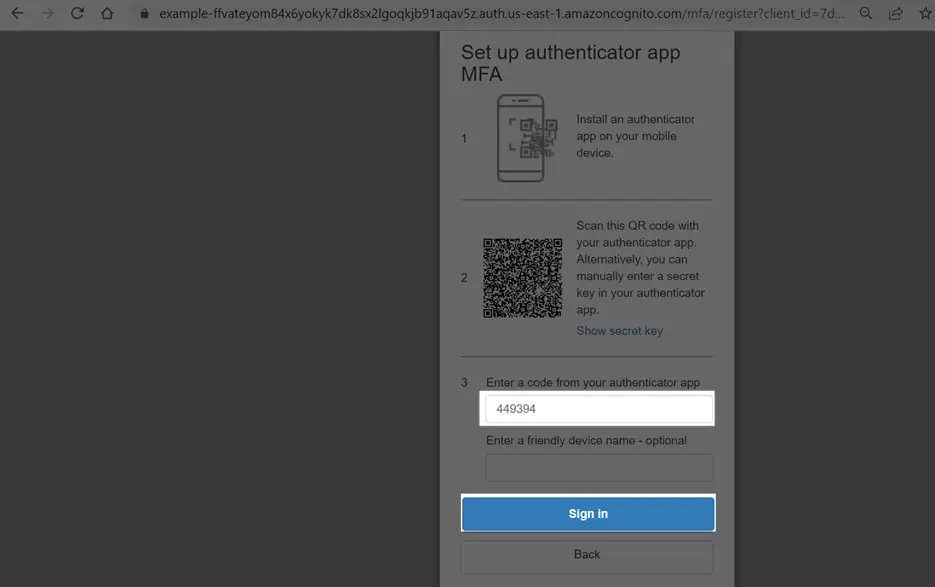
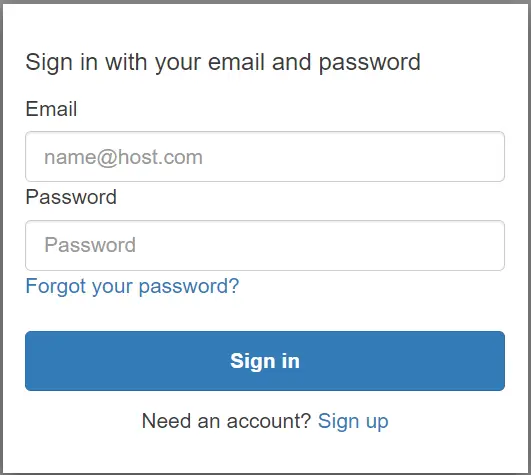
The login prompt would be look like something like the following:

Figure 1: Password-MFA Login Screen
Create Project through Cripsa
Login to Cripsa Dashboard by using email account
Once logged in Create project for OIDC.
Fill all the details. All the fields are required.
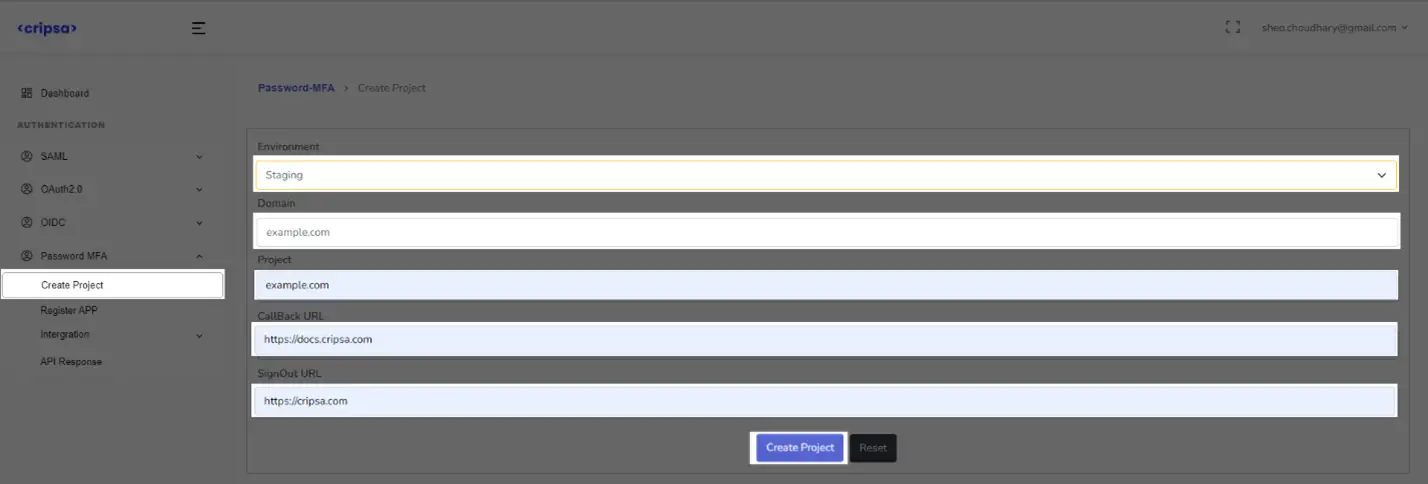
Click on “Create Project”.
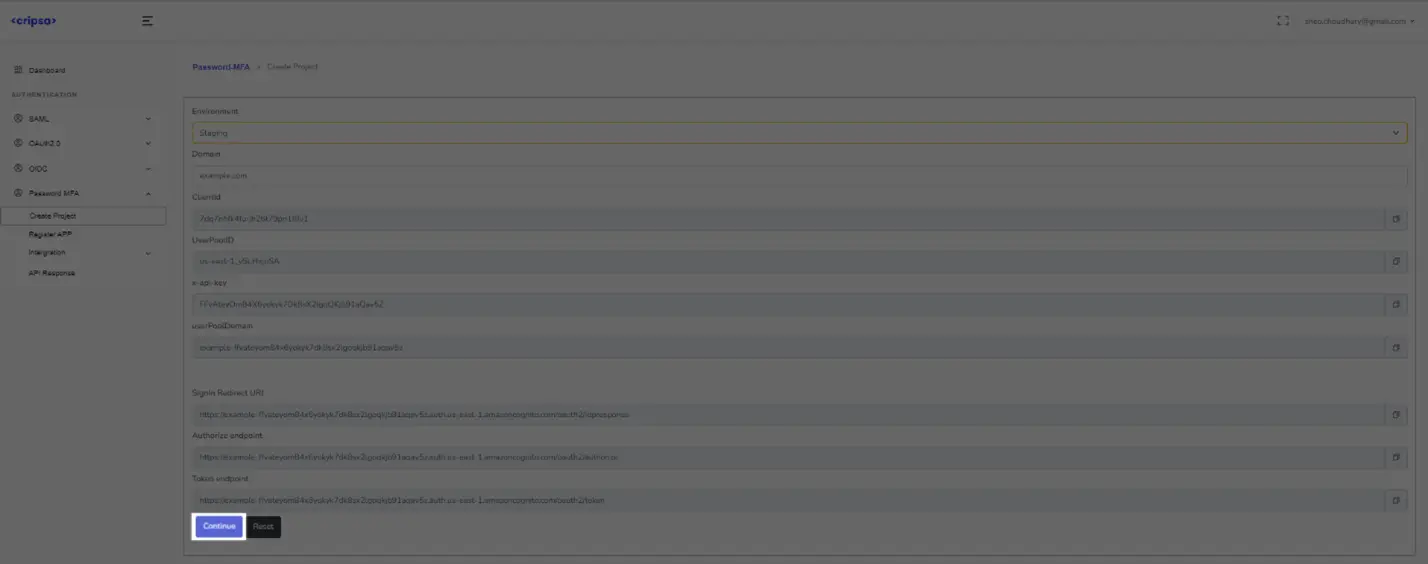
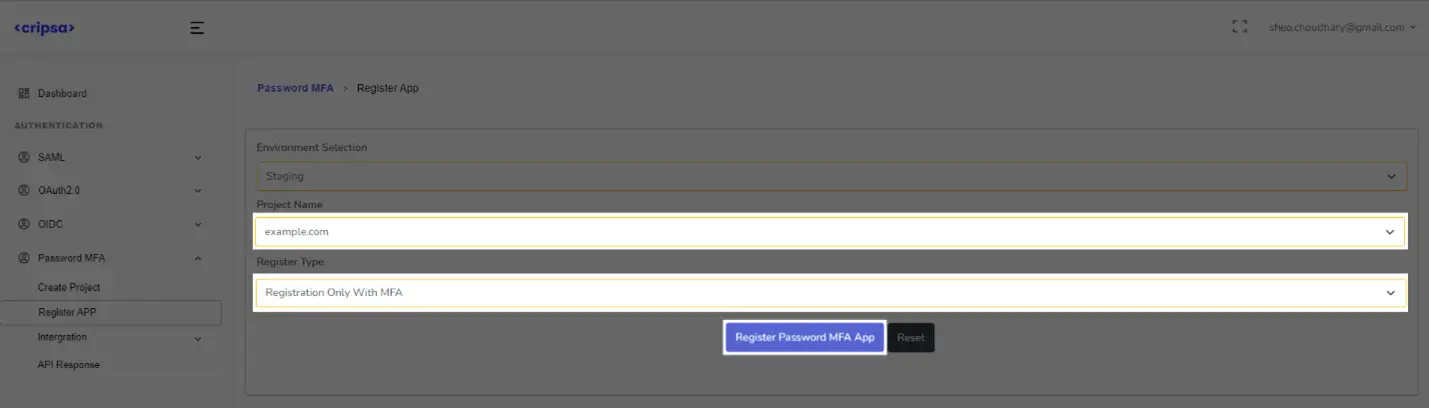
Now click on Continue or Register App.
Registering App with Cripsa
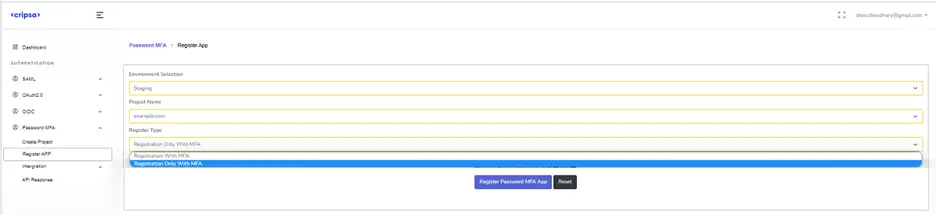
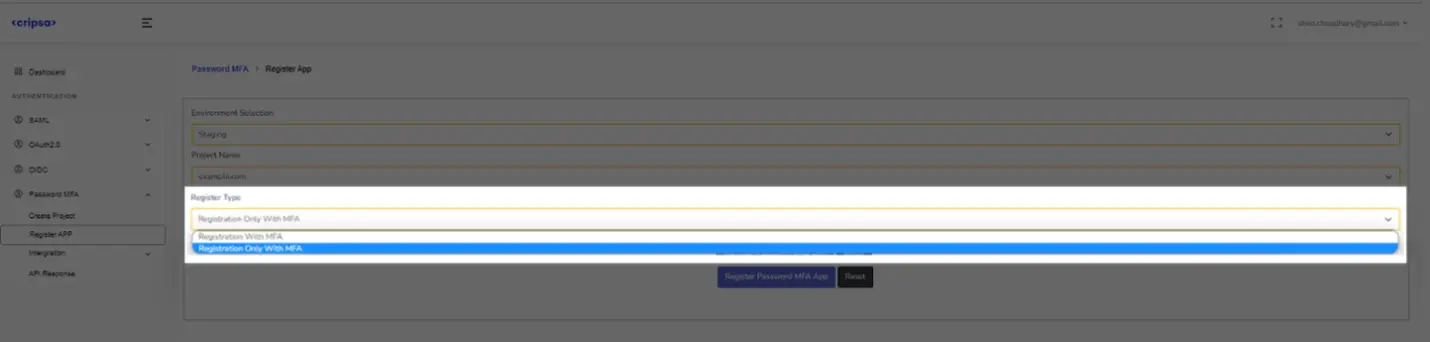
Now go back to https://cripsa.com/password-mfa-register-app ->Select your project you have just created.


Here Three Fields are Mandatory to fill:
- Environment
- Project Name
- Register Type
In the Register Type there are two options, and one has to select anyone of them as per your requirement. For more information on these options please see FAQ.

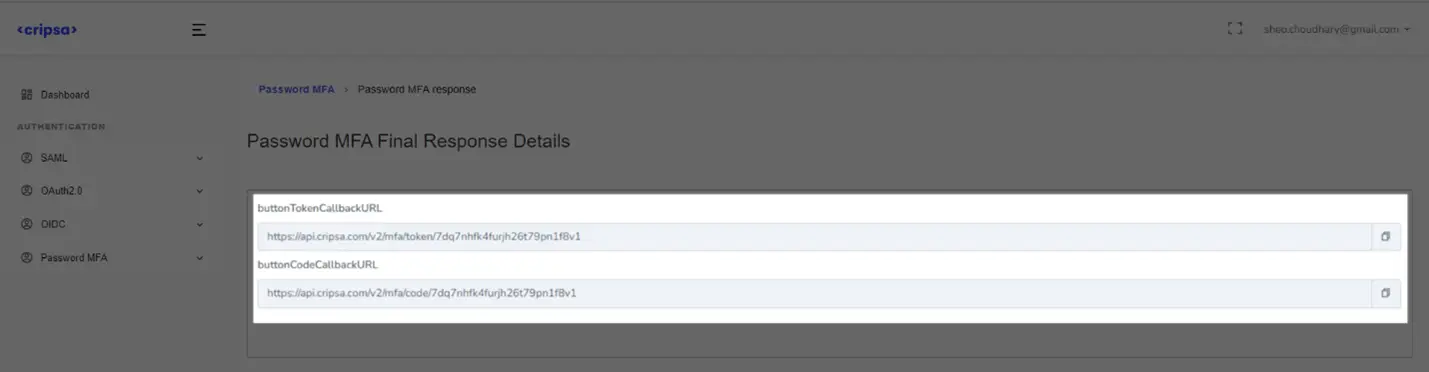
Now the client has to use the “buttonCodeCallbackURL” URL in their home page to bring the Password-MFA login prompt for the end user.
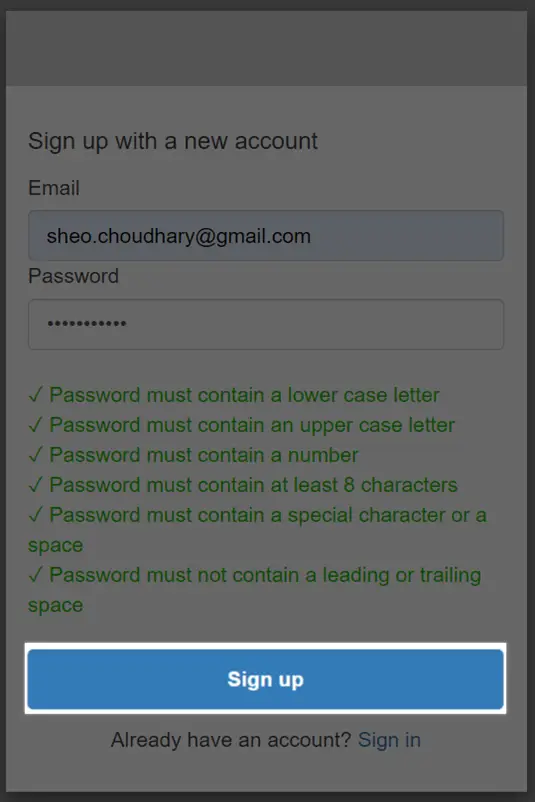
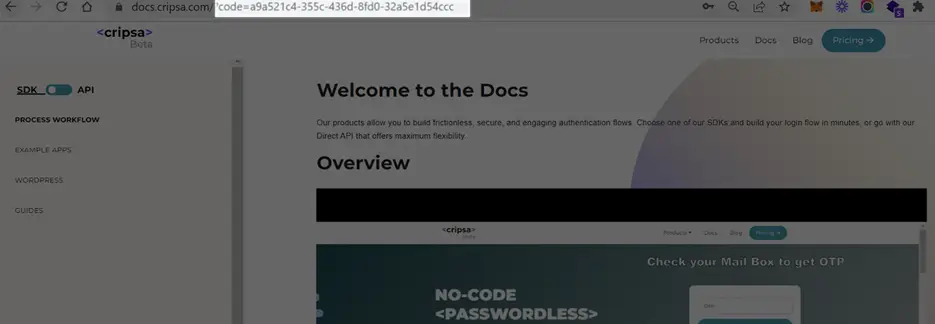
User Registration through Sign-up
Access the code URL and click on Sign up
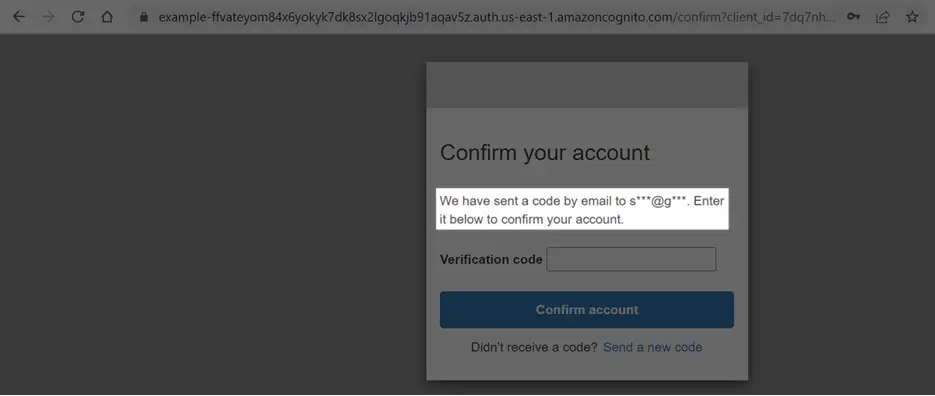
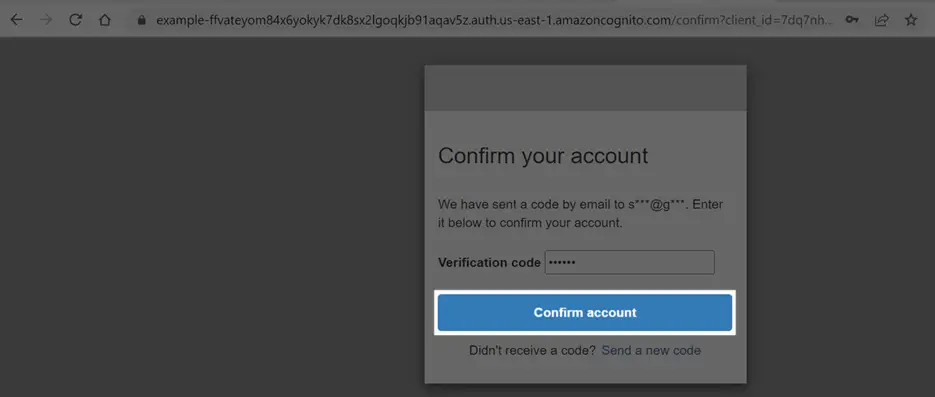
Now go to the e-mail ID and note down the verification code.

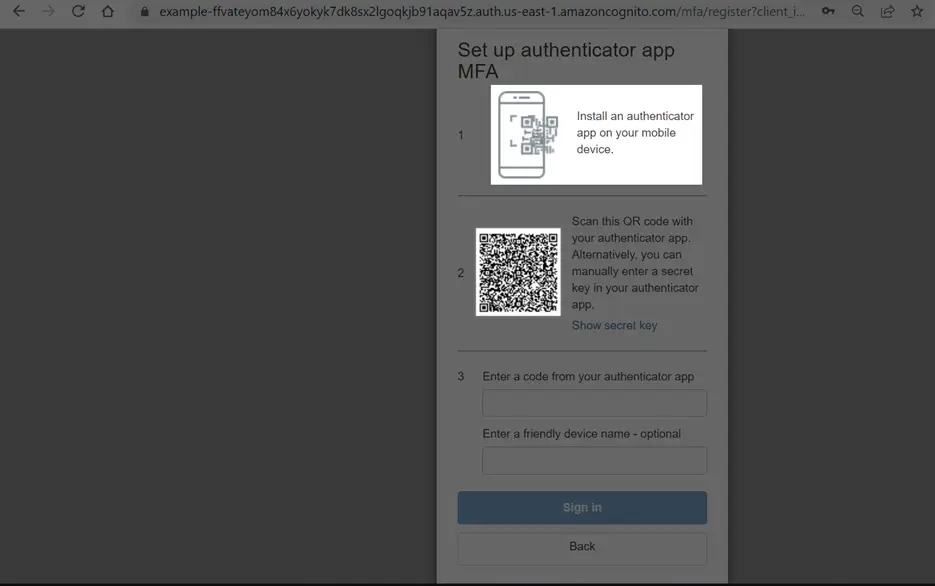
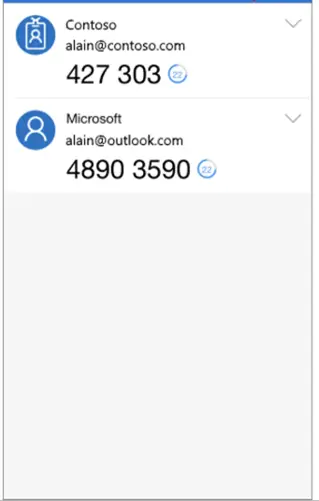
Now install Authenticator App (Google Authenticator or Microsoft Authenticator ) and scan the code to get the verification code.
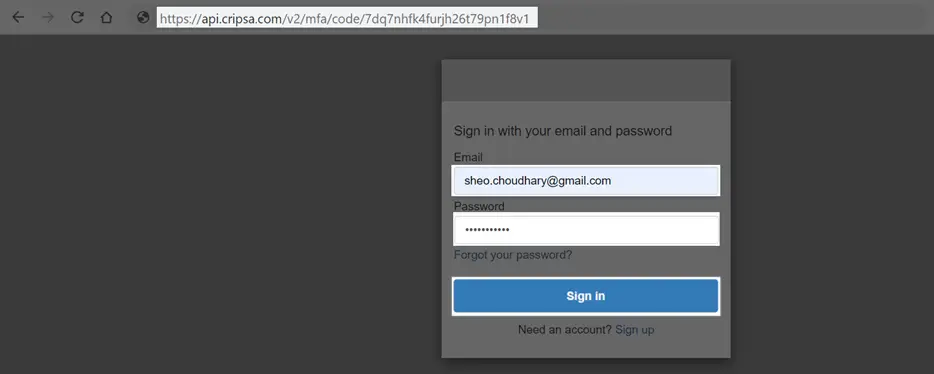
Now the user is registered. Now User can Sign-in using Authenticator Code and Password.
User Login Testing
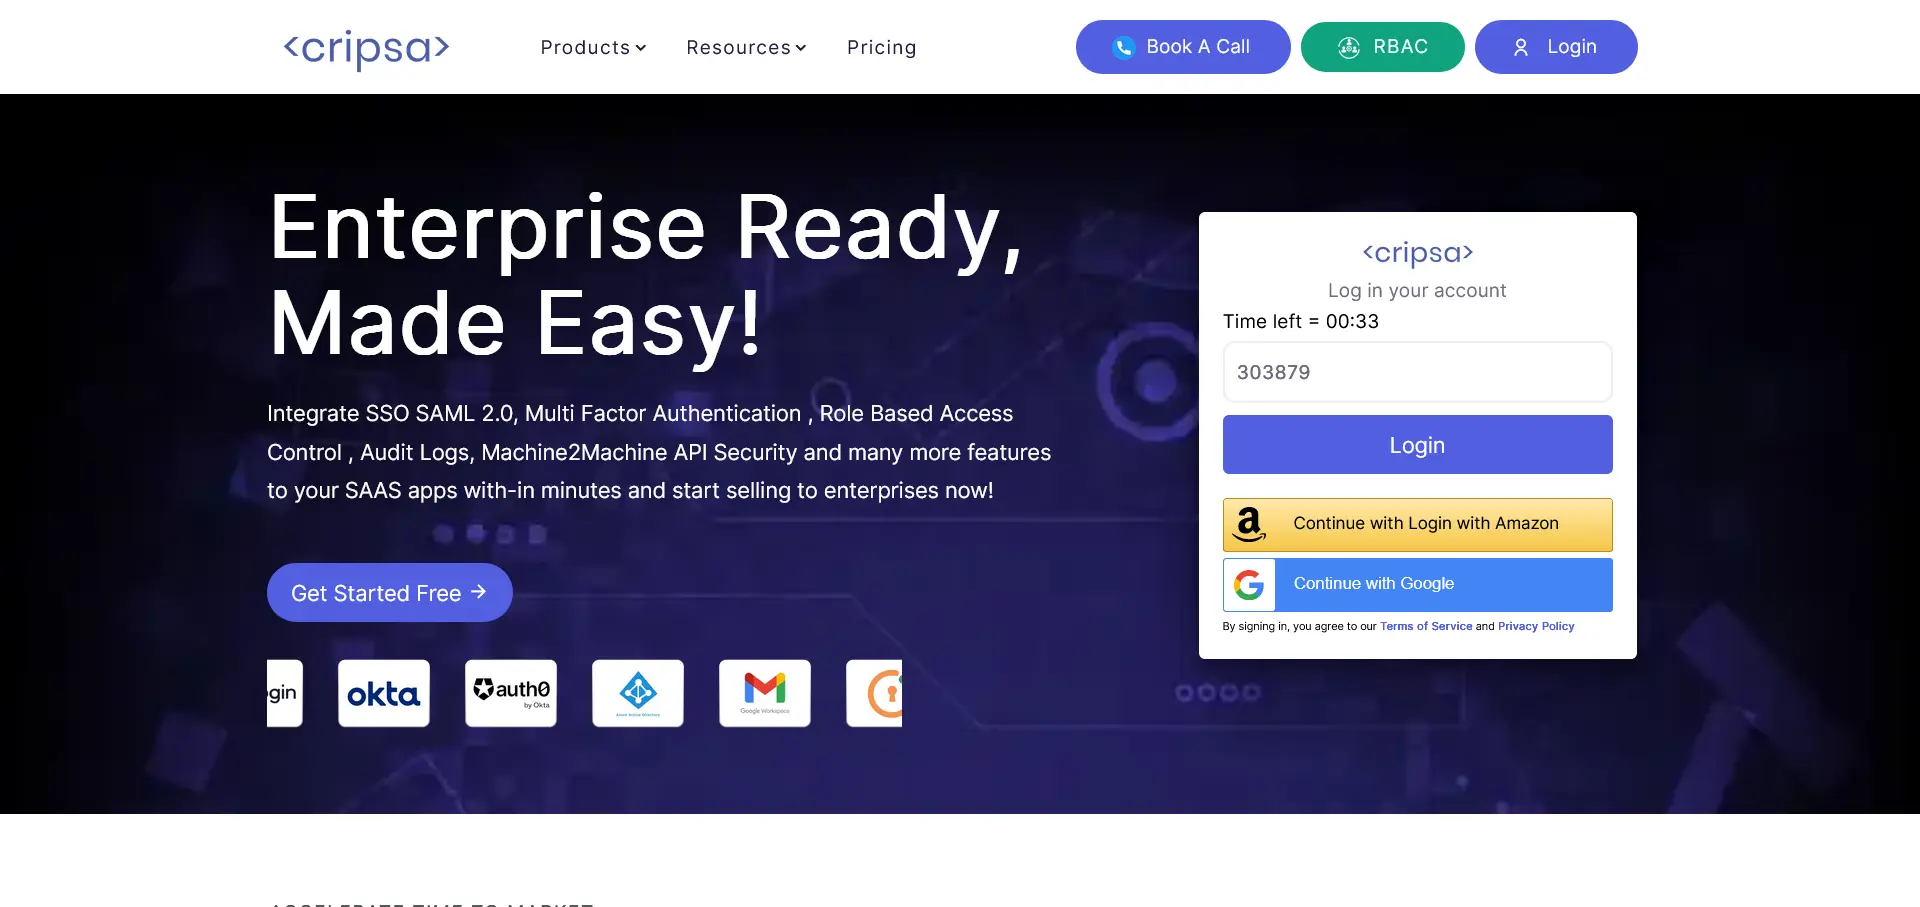
Using code URI to get Password-MFA login prompt.

Use the Authenticator App to get the Passcode. The above screen is just an example.
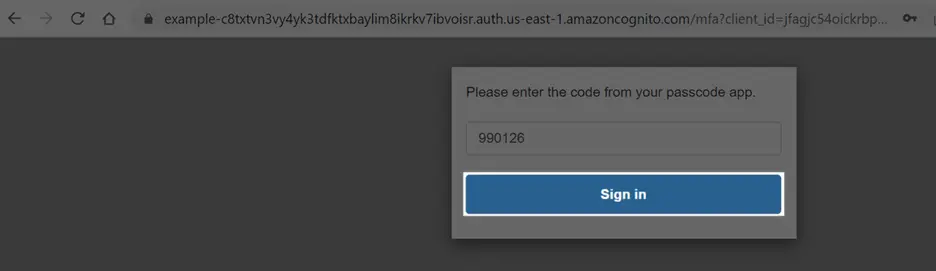
After putting the code click on Sign in.

Once successful Login the Application will return Code.
Similarly, if one can use “ButtonTokenCallbackURL” then it will return the Tokens (Access token and ID Token).
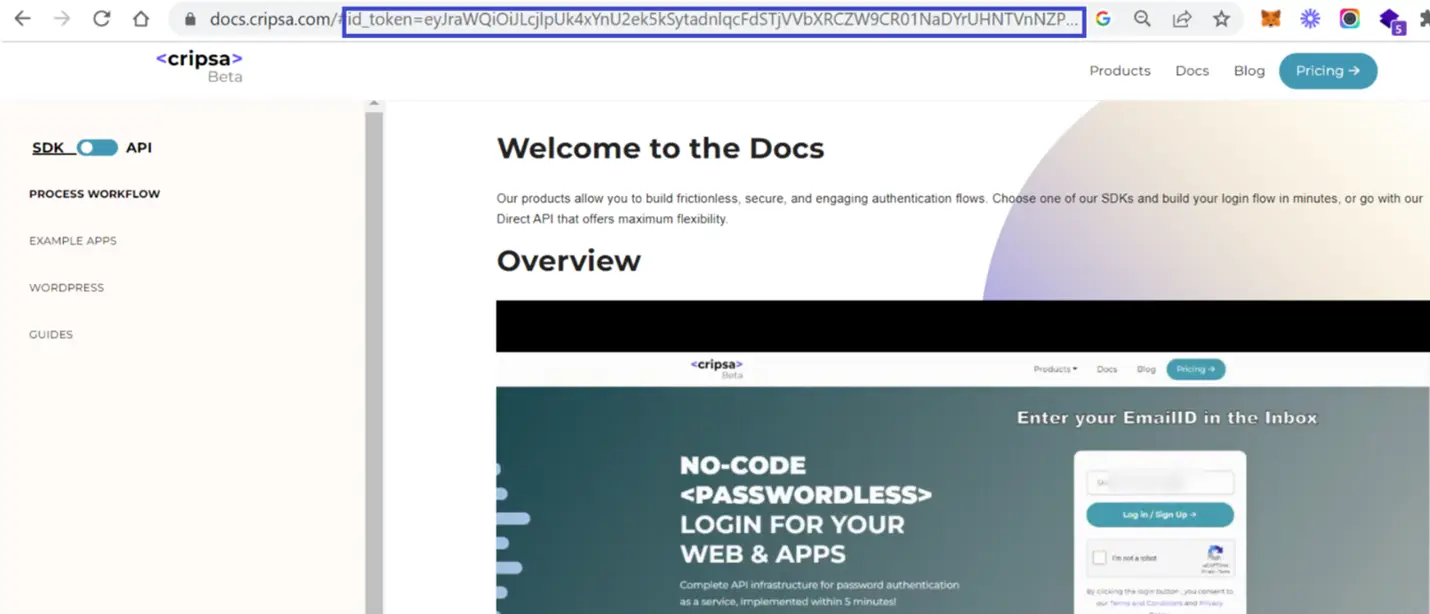
The ID Token can be verified through jwt library and customer can login the user after verification only.
Frequently asked questions
1. How many Registration Options available in Cripsa for OIDC and what is the difference between them?
In the Register Type there are four options:
- Registration with MFA
- Registration with Only MFA
Only the Login screen would be Different for each Registration Type.
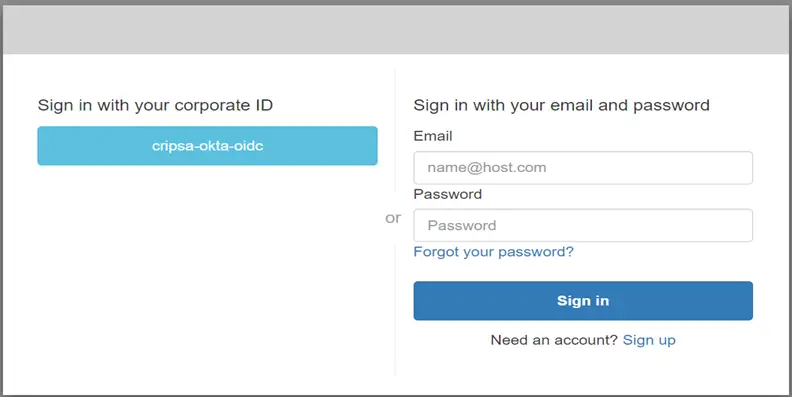
Here in the above diagram one can see MFA is available along with OIDC authentication.
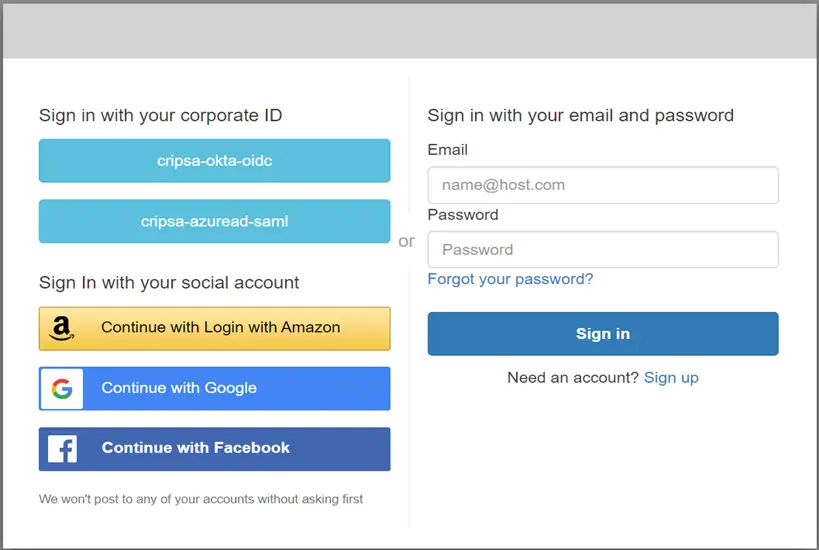
Here in the above diagram one can see MFA is available along with OIDC and AUTH 2.0 authentication.