


Google WorkSpace SAML Integration
Learn how to configure a connection to Google Workspace via SAML.
Introduction
Each SSO Identity Provider requires specific information to create and configure a new Connection (through Application registered). Often, the information required to create a connection will differ by Identity Provider.
Google integration with Cripsa using SAML consists of 4 parts,
- 1. Create a project/select (an existing) project by logging into https://cripsa.com
- 2. Create an App in Google Workspace using admin account in https://admin.google.com
- 3. Use Metadata URL information of the Google Workspace App registered to integrate it with Cripsa.
- 4. Use the Final URI received to call against the User click to start the Authentication process.
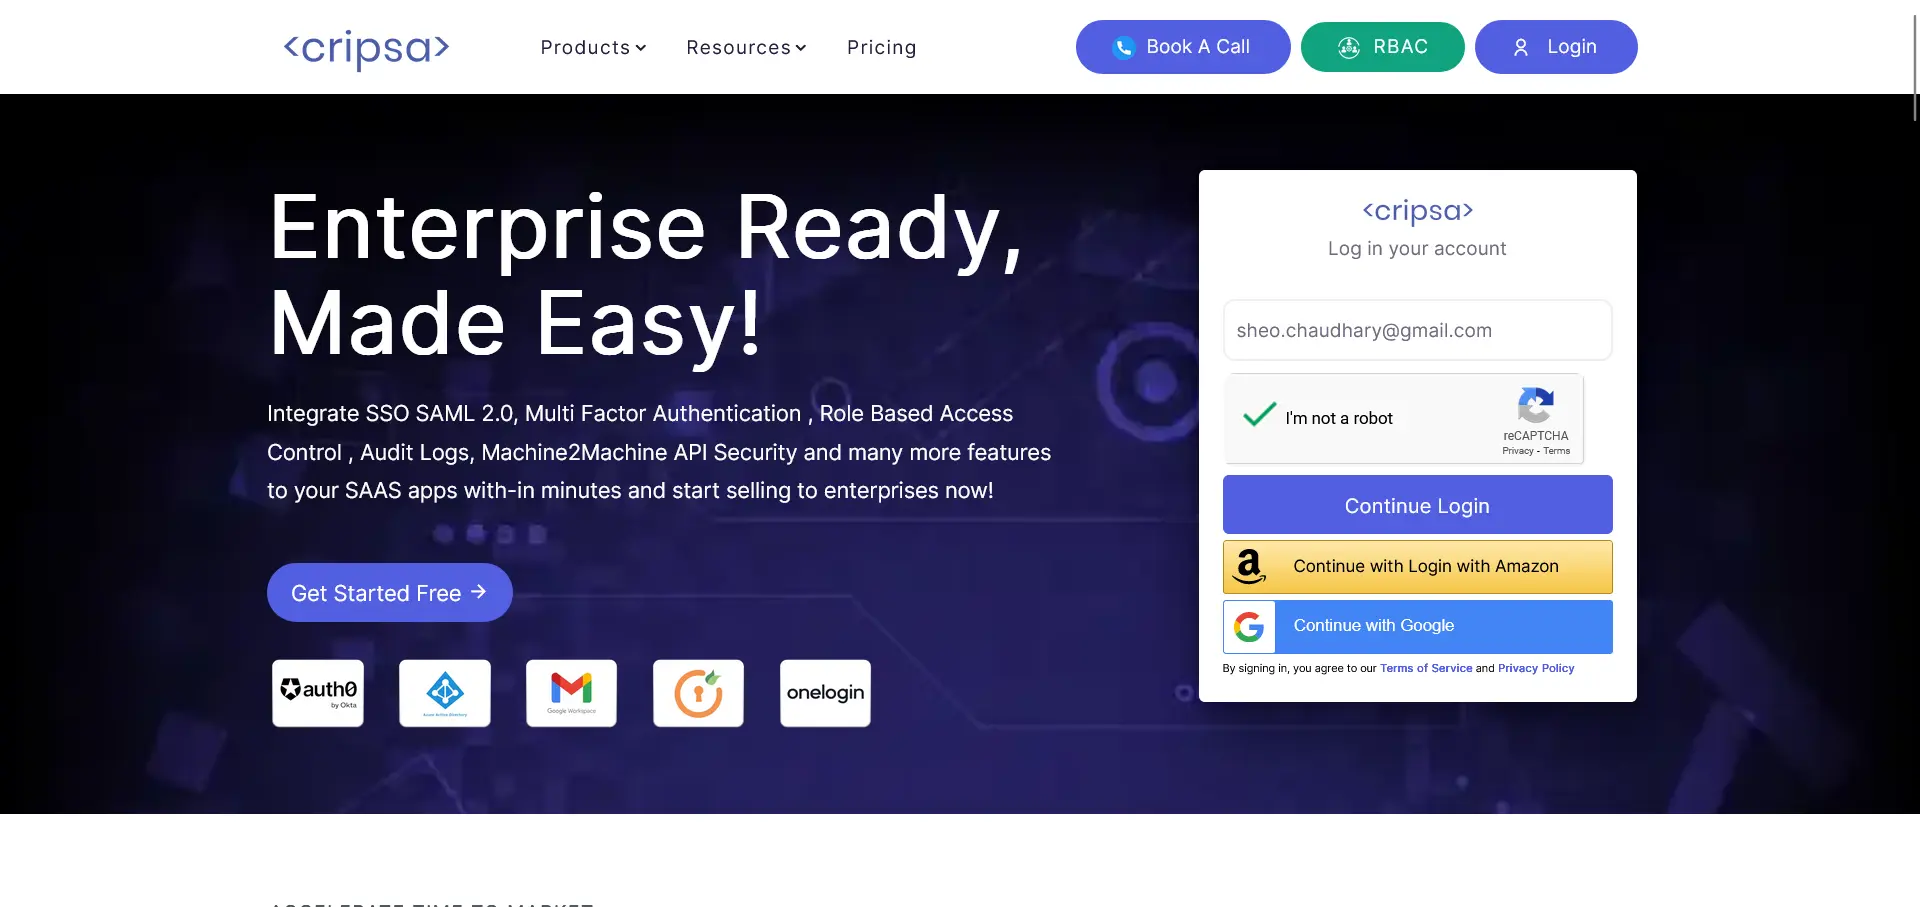
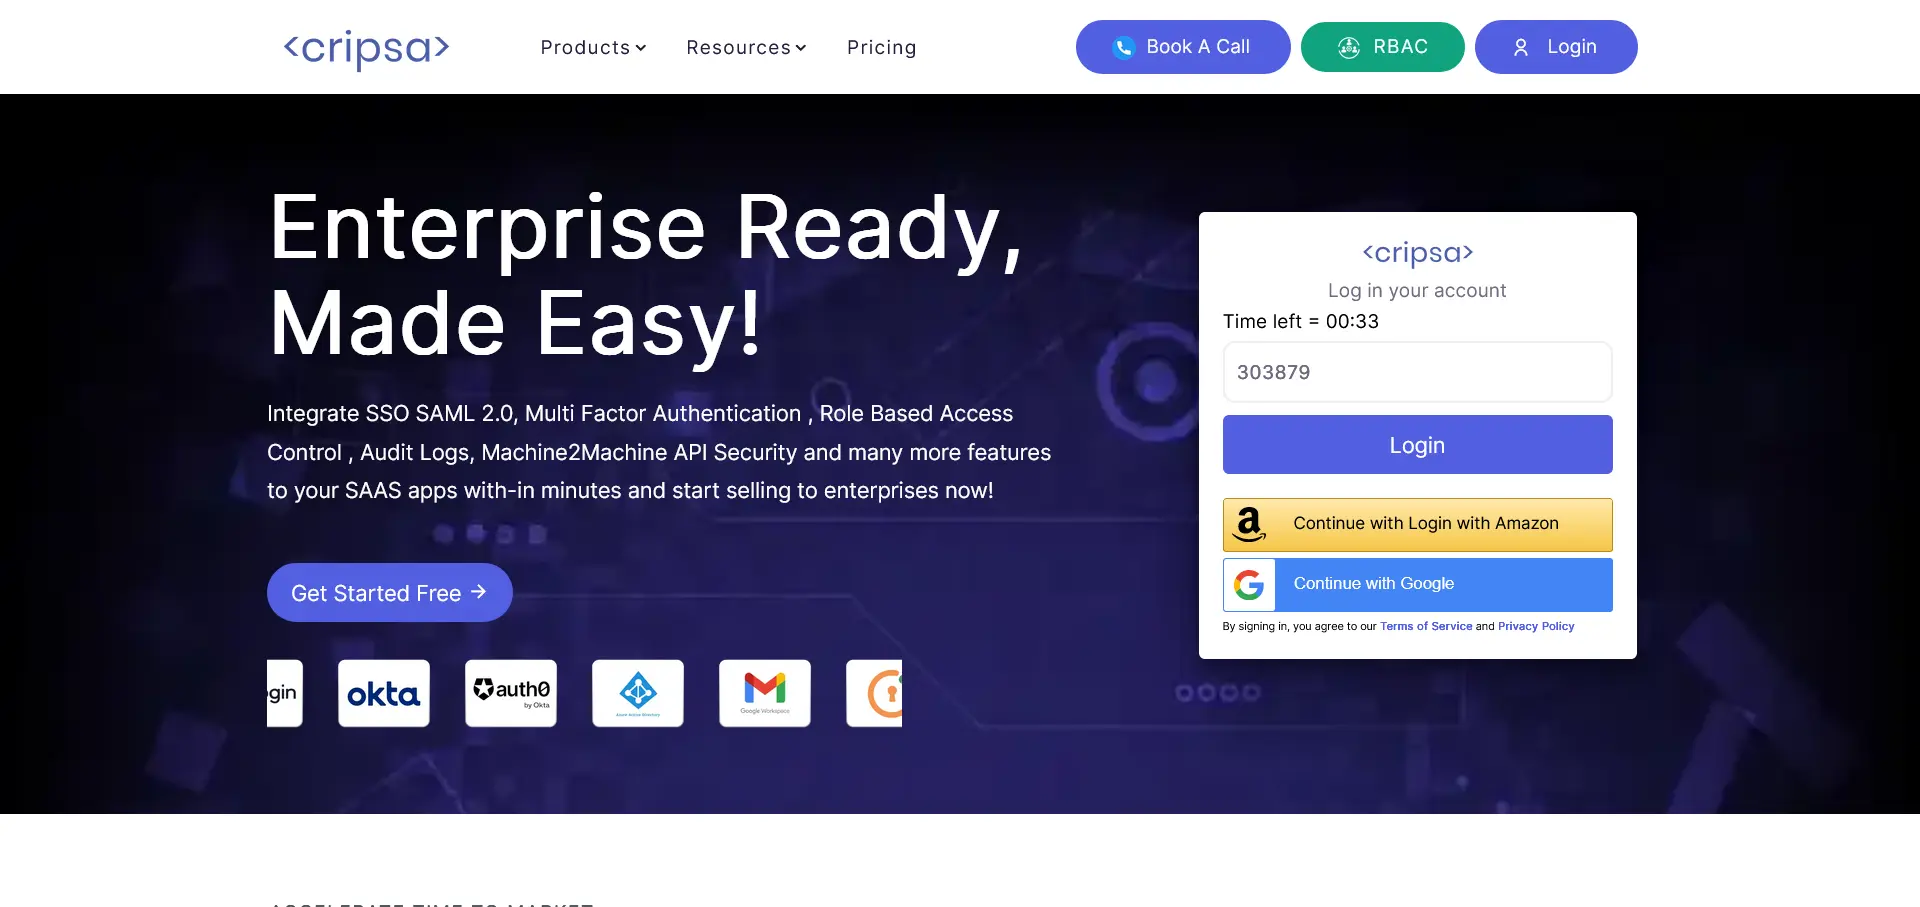
Create Project through Cripsa
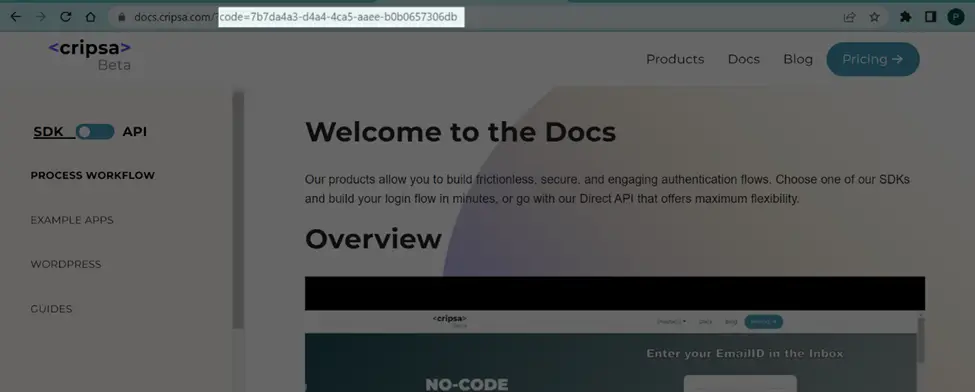
Login to Cripsa Dashboard by using email account
Once logged in Create project for SAML.
Fill all the details. All the fields are required.
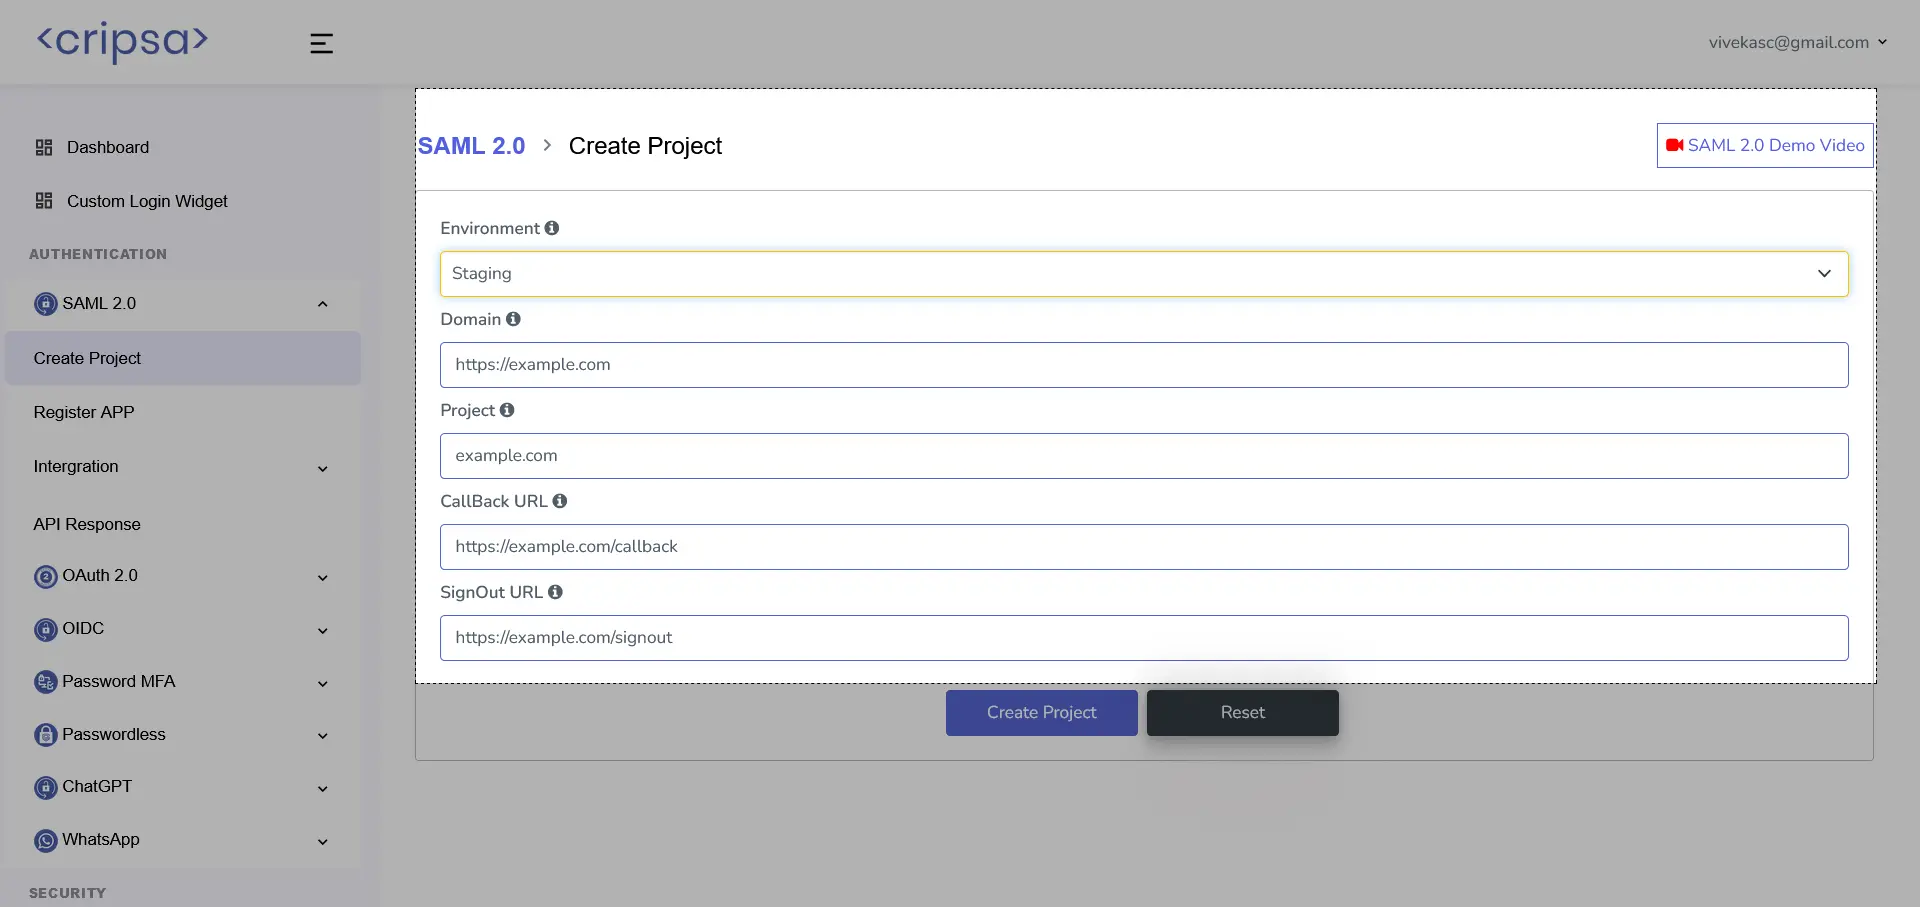
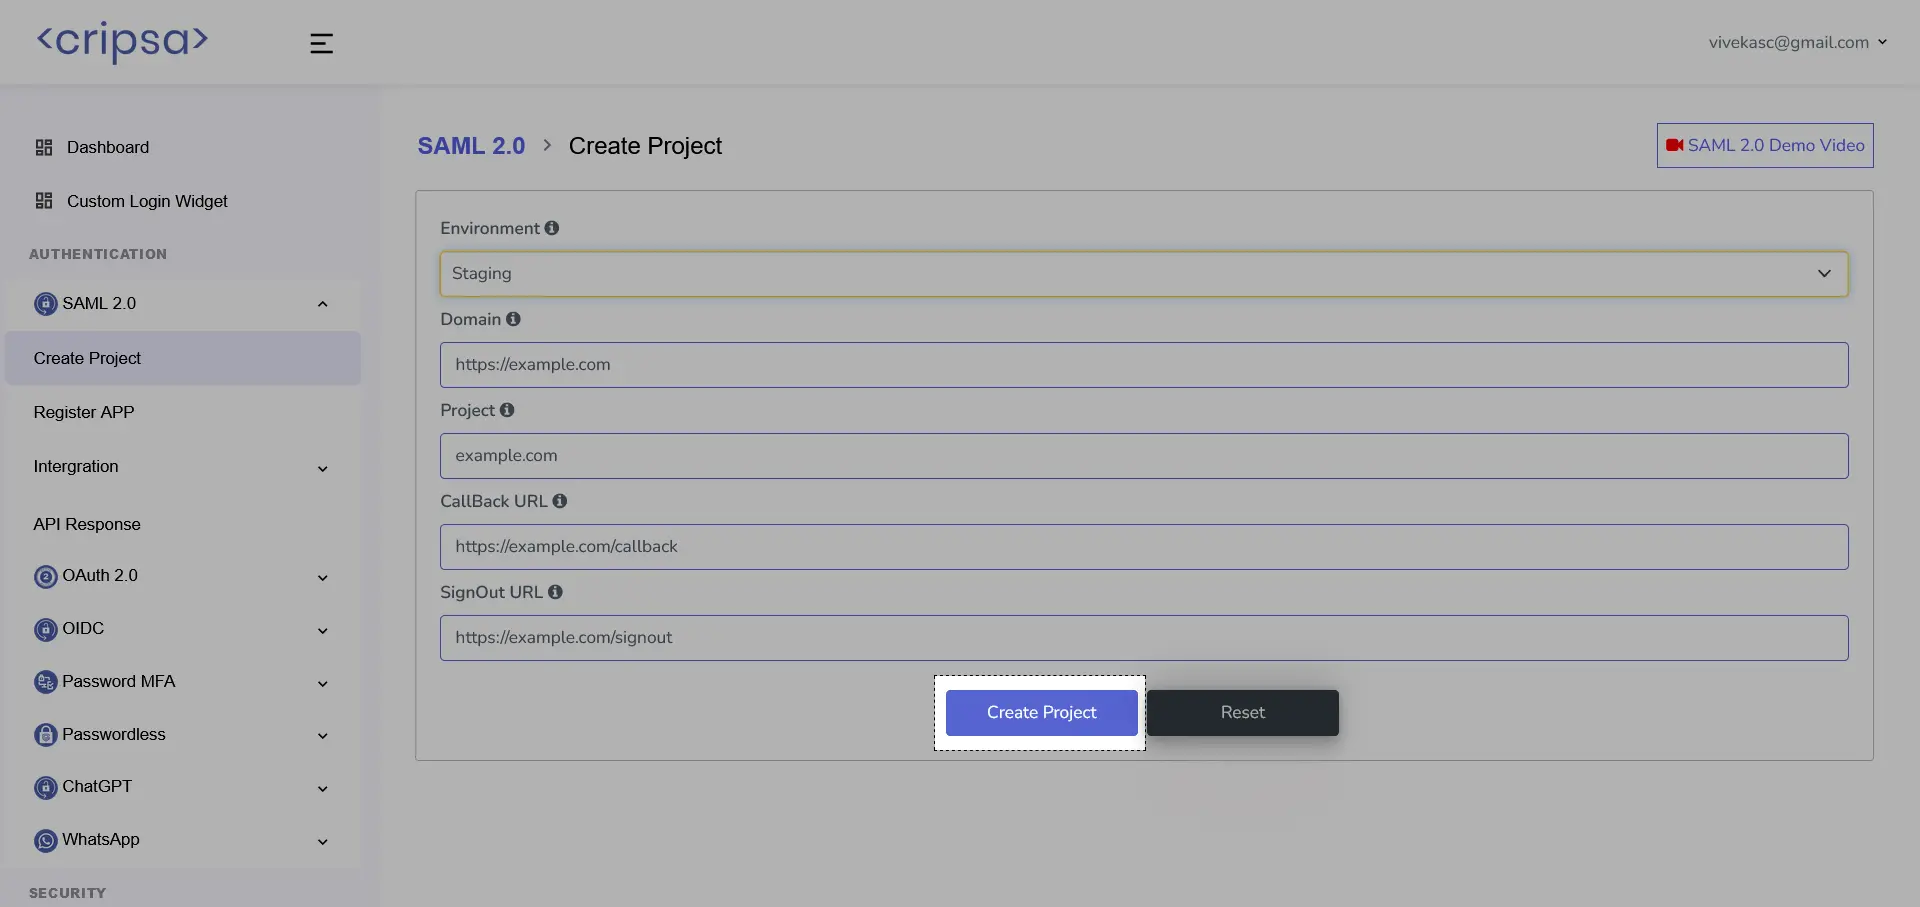
Click on “Create Project”.
Note Down all the above highlighted information which will be used while creation of the App in Google Admin Console (https://admin.google.com).
What Cripsa provides
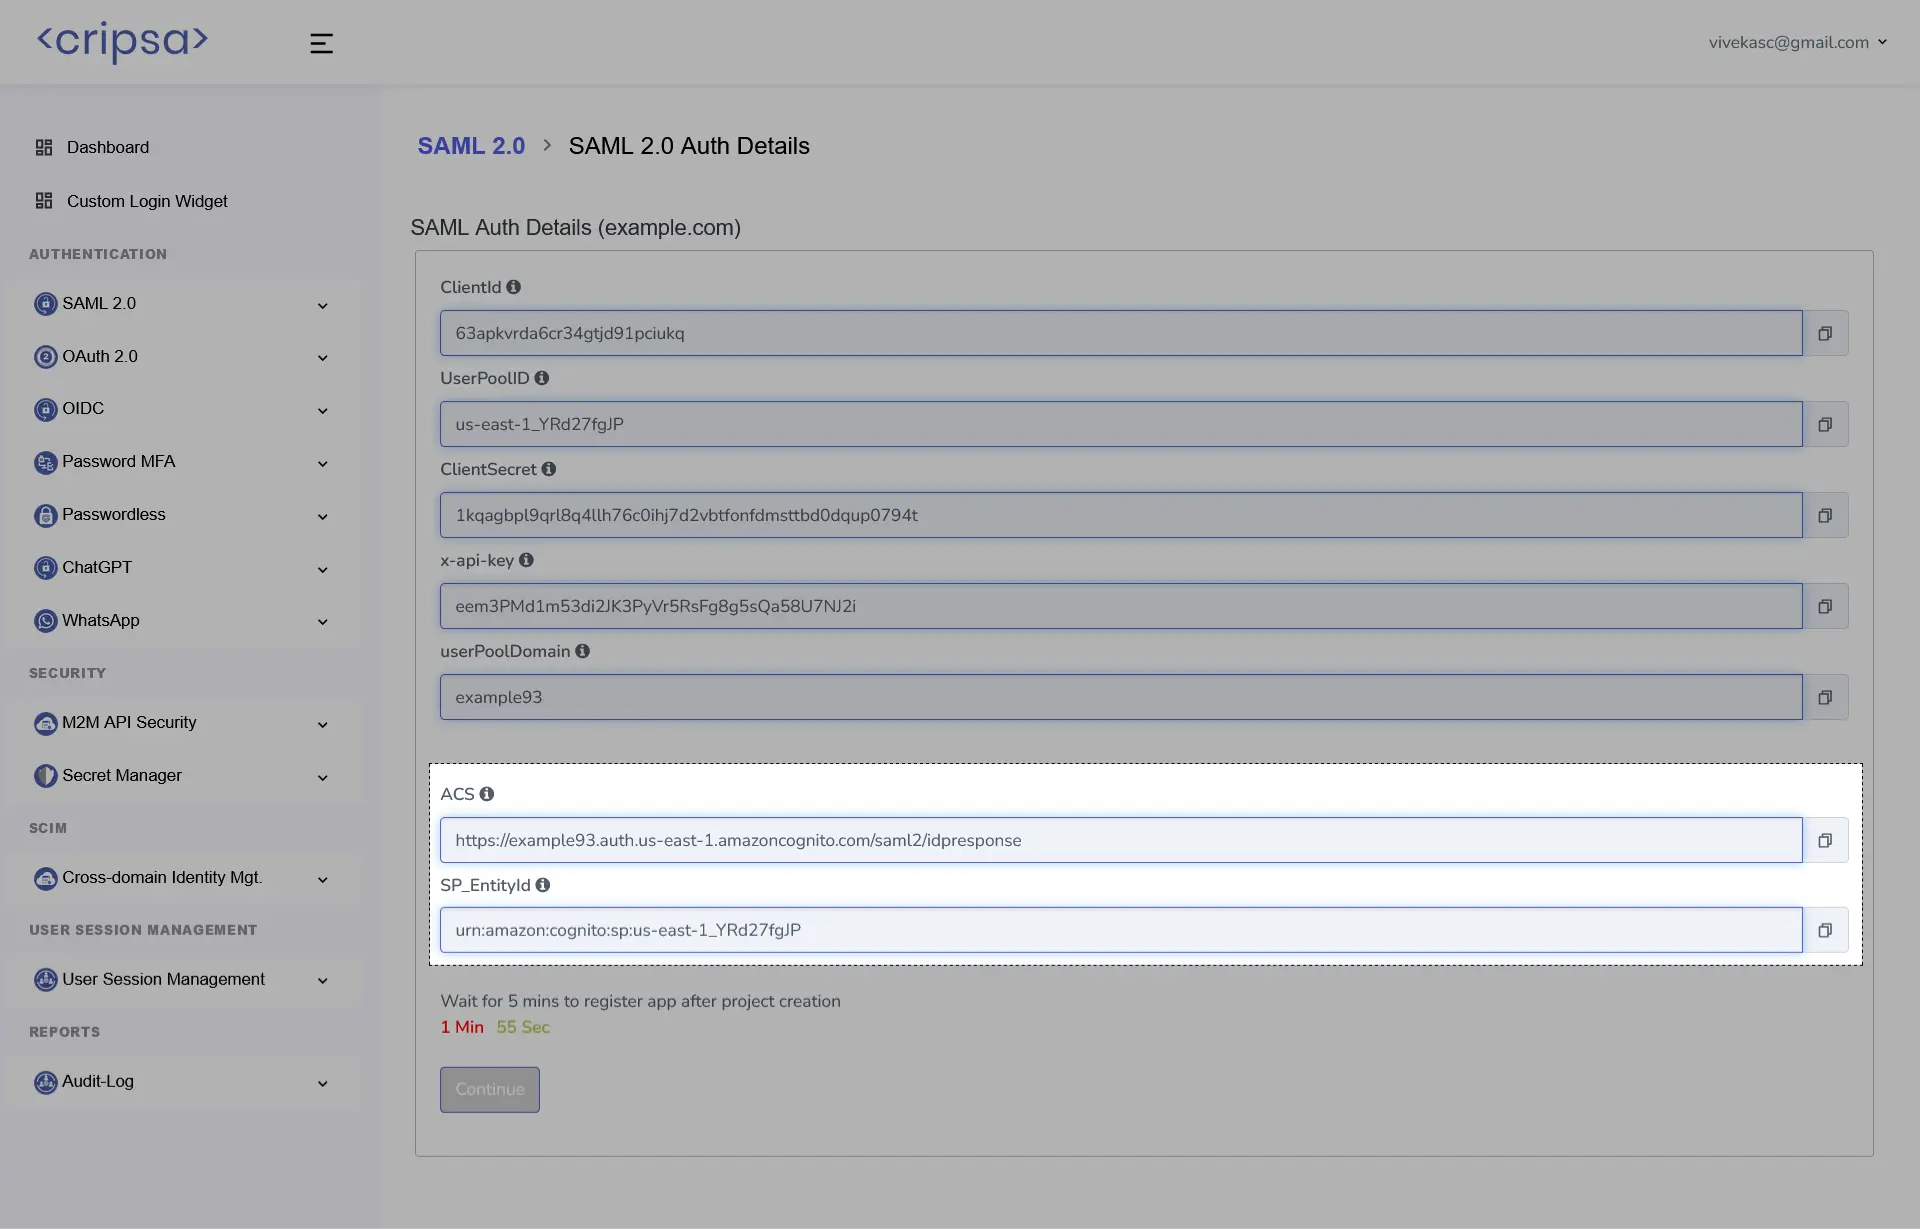
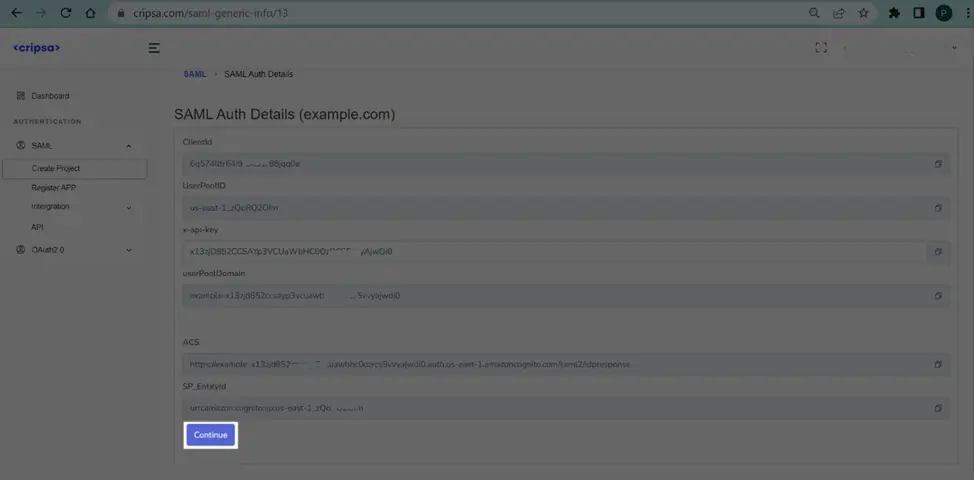
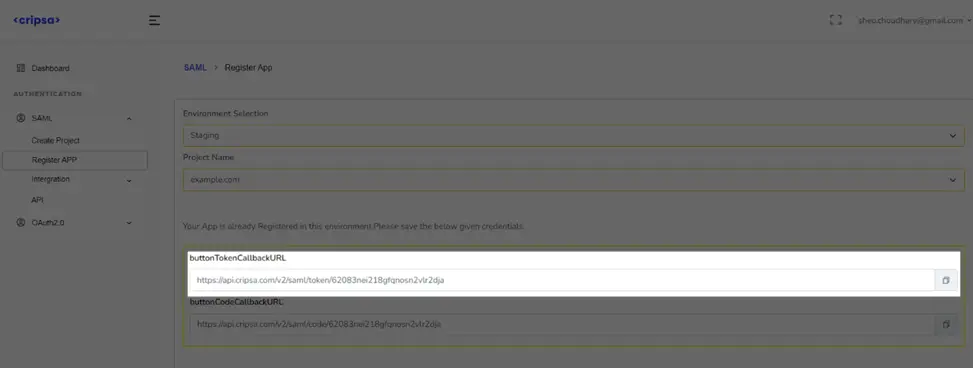
Cripsa provides the ACS URL and the SP Entity ID. It’s readily available in your Project Detail page of Cripsa Dashboard.
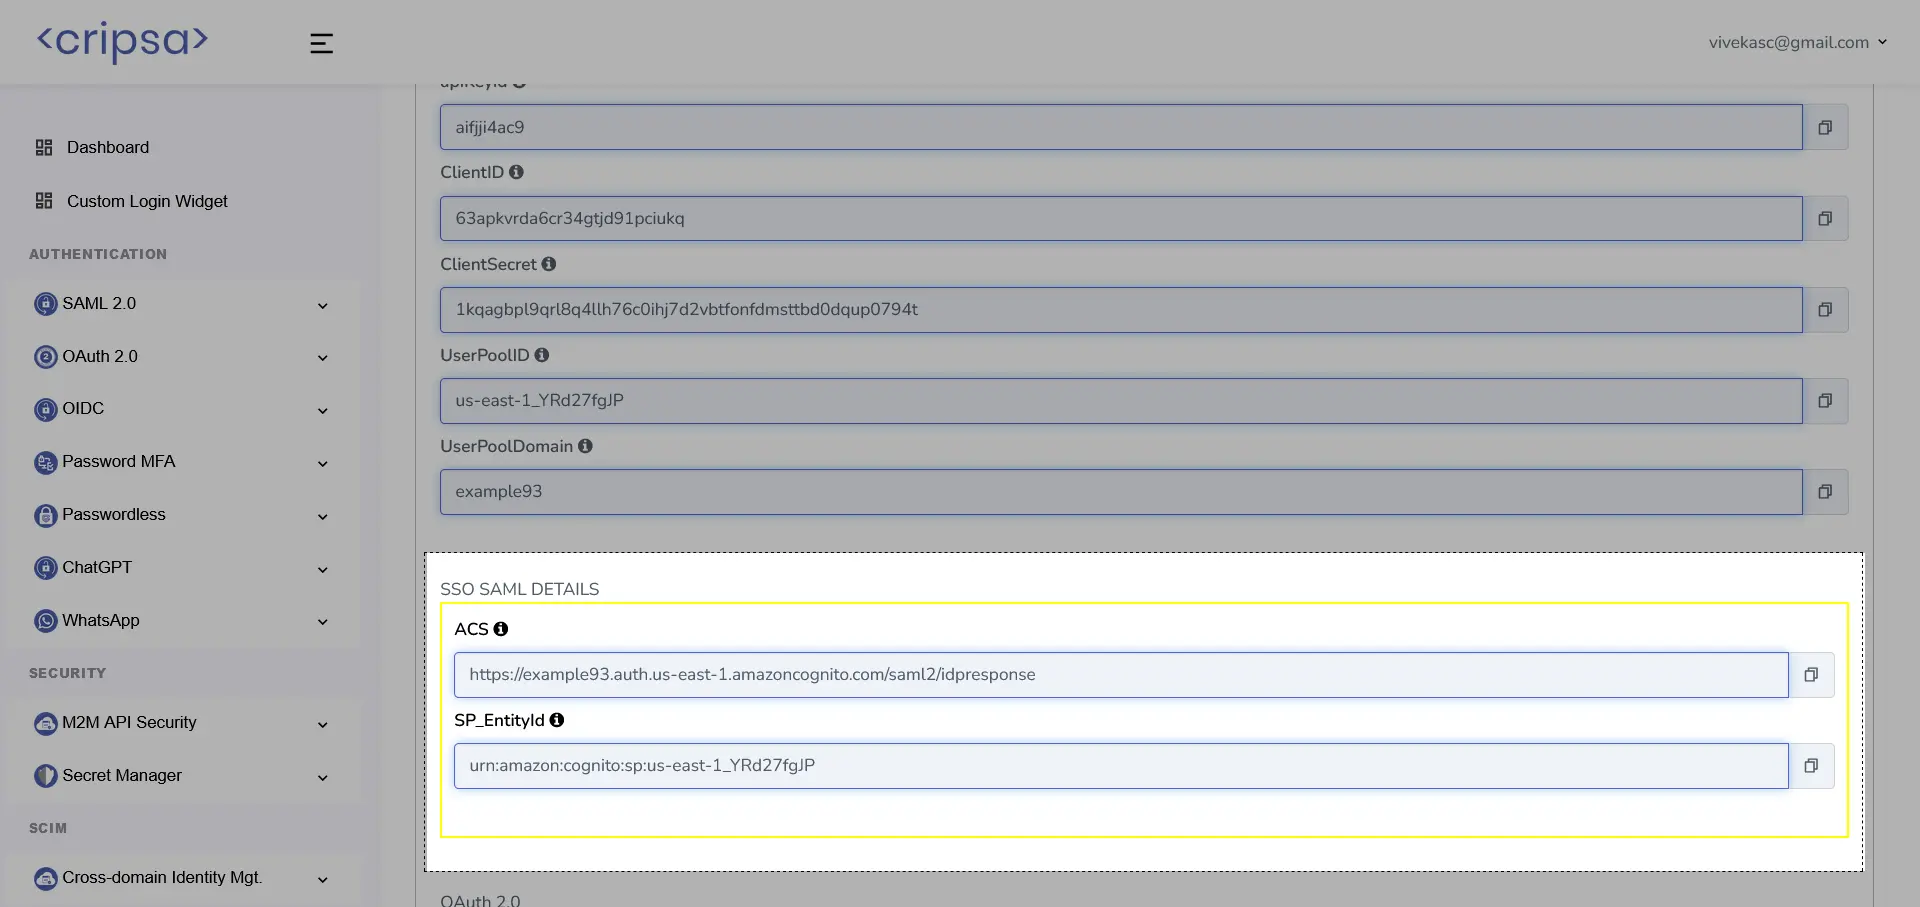
The ACS URL is the location an Identity Provider redirects its authentication response to. In Google’s case, it needs to be set by the Enterprise when configuring your application in their Google admin dashboard.
The SP Entity ID is a URI used to identify the issuer of a SAML request, response, or assertion. In this case, the entity ID is used to communicate that Cripsa will be the party performing SAML requests to the Enterprise’s Google instance.
Specifically, the ACS URL will need to be set as the “ACS URL” and the SP Entity ID will need to be set as the “Entity ID” in the “Service Provider Details” step of the Google SAML setup.
What you’ll need
In order to integrate you’ll need the metadata XML file from Google.
Normally, this information will come from your Enterprise customer’s IT Management team when they set up your application’s SAML 2.0 configuration in their Google admin dashboard. But should that not be the case during your setup, here’s how to obtain it.
1. Log in
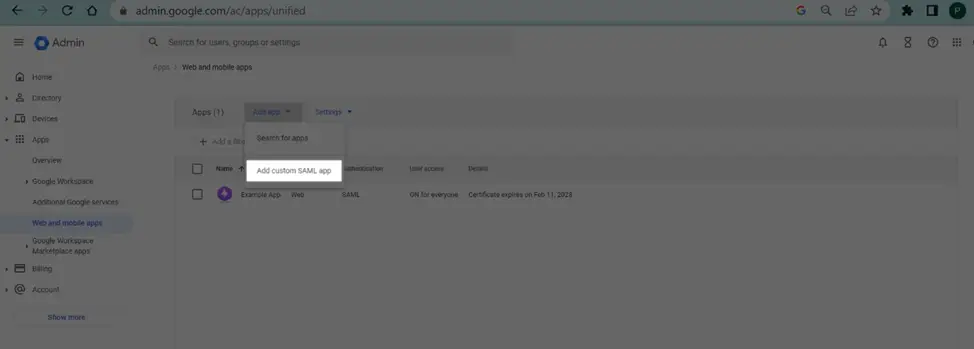
Log in to the Google Admin dashboard, select “Apps” from the sidebar menu, and then select “Web and Mobile Apps” from the following list. If your application is already created, select it from the list of applications and move to Step 7. If you haven’t created a SAML application, select “Add App” and then “Add custom SAML app”.
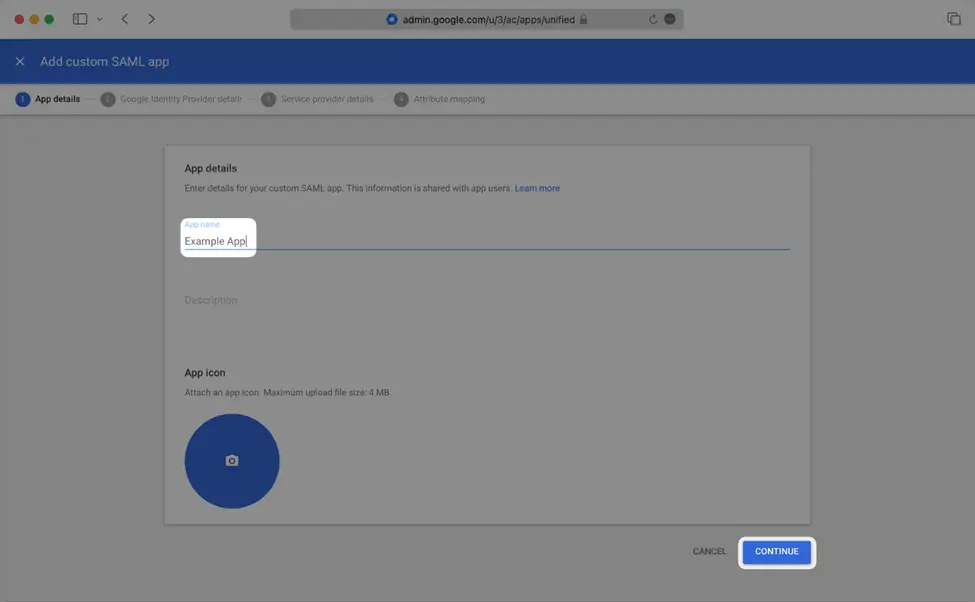
2. Enter Your App’s Information
Give the app a descriptive name and upload an icon, if applicable. Click “Continue”.
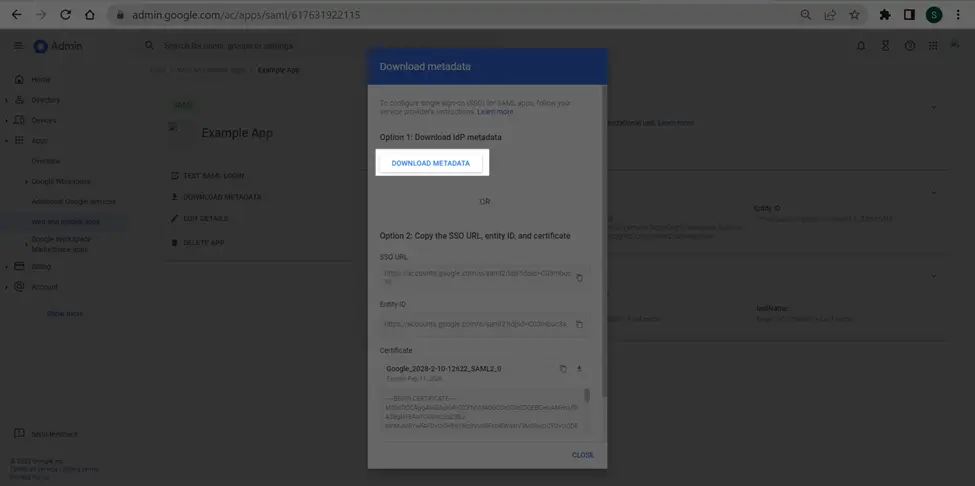
3. Obtain Identity Provider Details
Select the “Download Metadata” button to download the metadata file. Save this file, as you’ll upload it to the Cripsa Dashboard in Step 7. Click “Continue”.
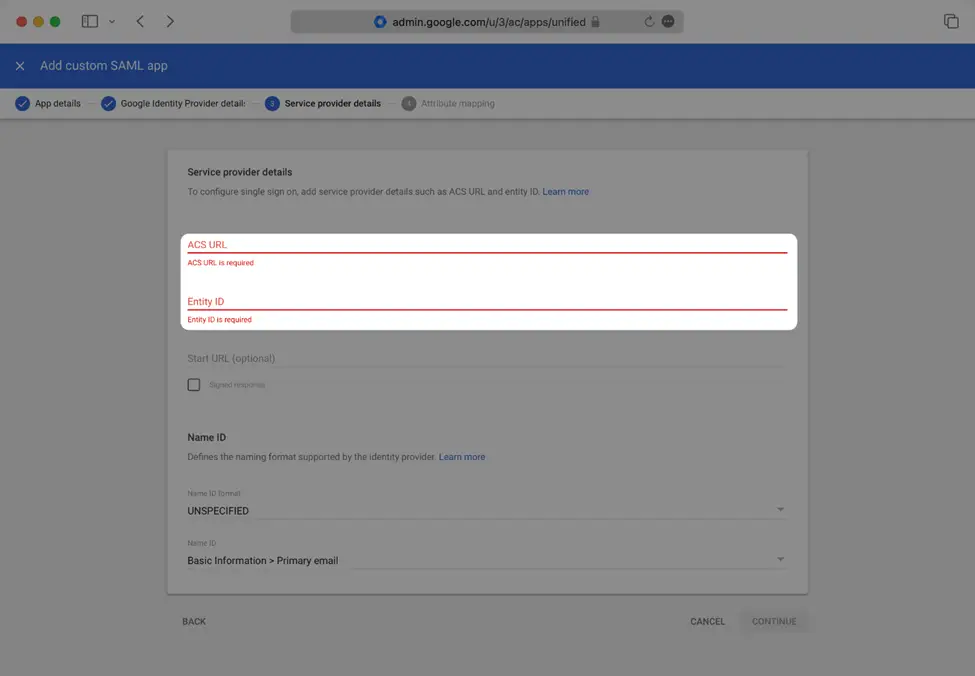
4. Enter Service Provider Details
Copy and the “ACS URL” from your Cripsa Dashboard and paste it into the “ACS URL” field, and copy the “SP Entity ID” from your Cripsa Dashboard and paste it into the “Entity ID” field in the Google SAML “Service provider details” modal. Select “Continue.”
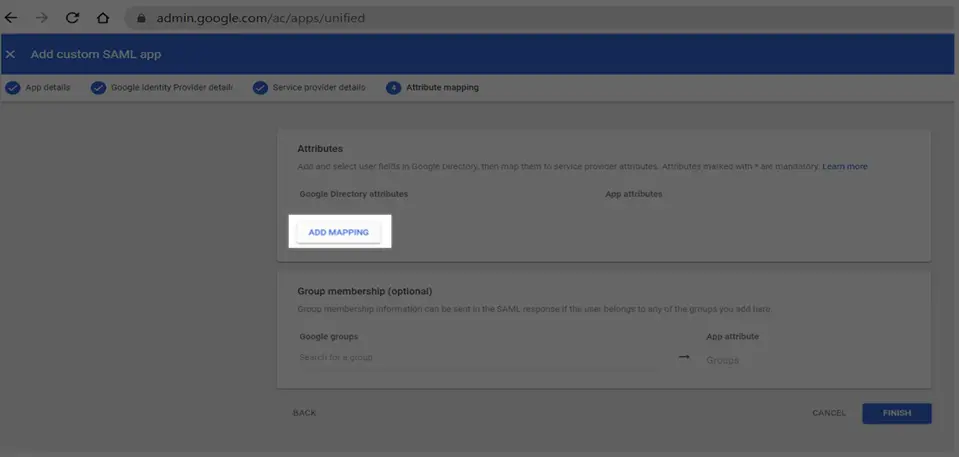
5. Configure Attribute Mapping
5. Configure Attribute Mapping
Google SAML does not provide the option to map a user’s id attribute claim.

Mapping detail should be as follows:
Primary email->http://schemas.xmlsoap.org/ws/2005/05/identity/claims/emailaddress6. Configure User Access
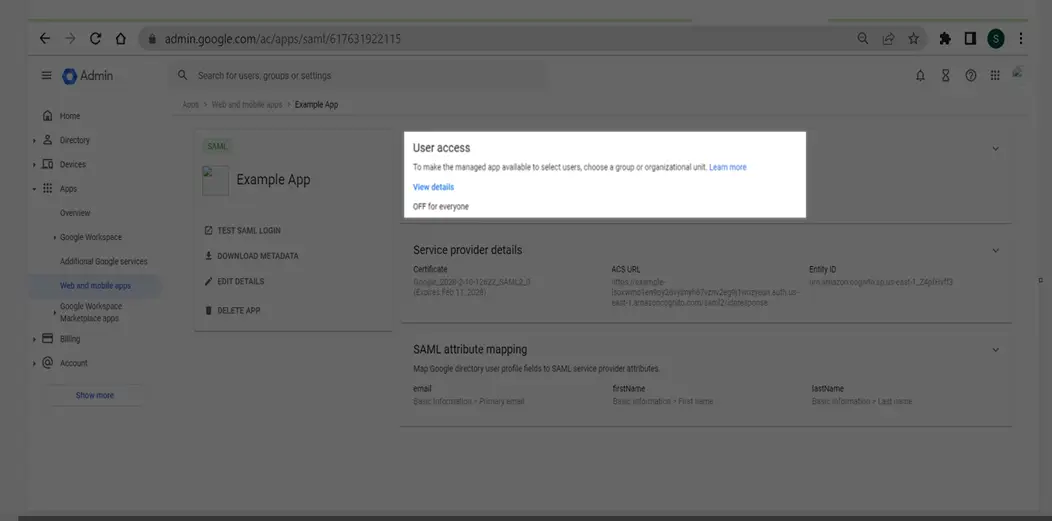
In the created SAML app’s landing page, select the “User Access Section”.
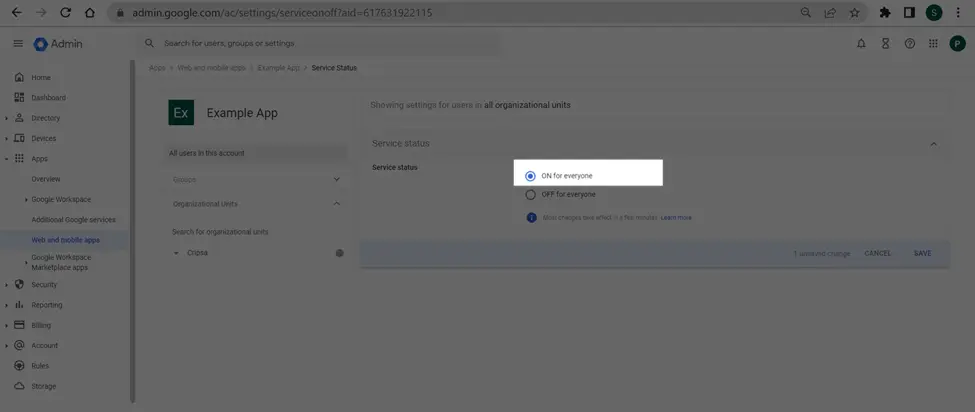
Turn this service ON for the correct organizational units in your Google Directory setup. Save any changes.
Google may take up to 24 hours to propagate these changes. The connection in Cripsa will be inactive until then.
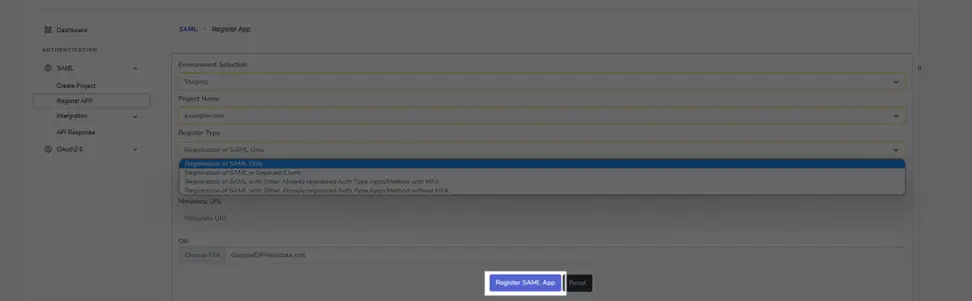
7. Upload Metadata File by Register Google App with Cripsa
If you haven’t already downloaded the metadata file, select your SAML application, and click “Download Metadata”. In the modal, again click “Download Metadata”.
Now go back to https://cripsa.com/saml-register-app ->Select your project you have just created.
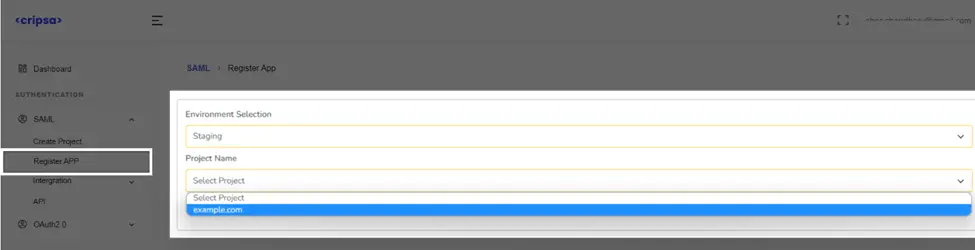

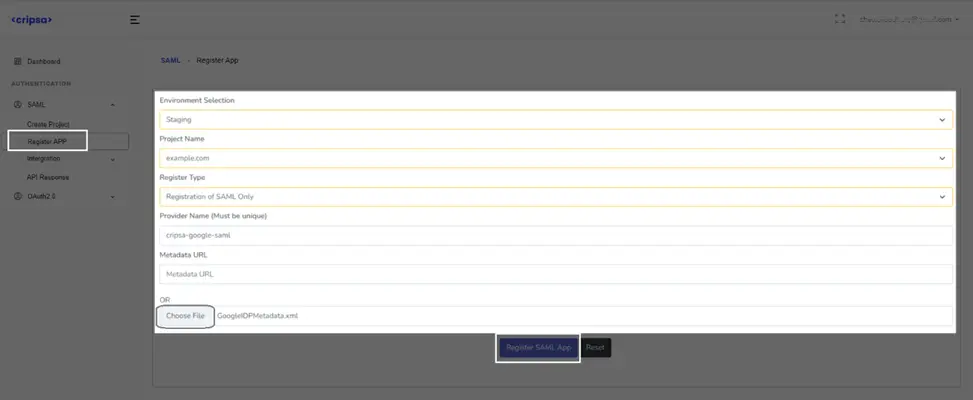
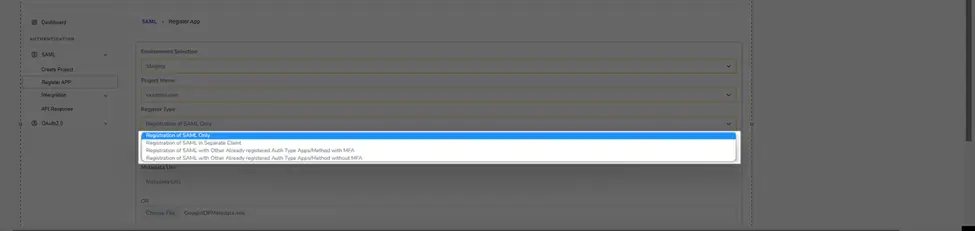
Here Three Fields are Mandatory to fill:
- Register Type
- Provider Name (name must be unique with no special character and all in small letter)
- Metadata URL or File Upload
In the Register Type there are four options, and one has to select anyone of them as per your requirement. For more information on these options please see FAQ.
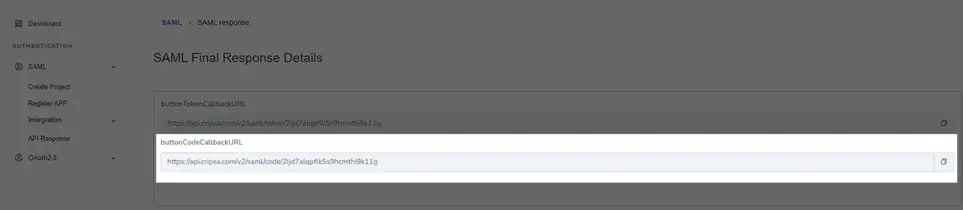
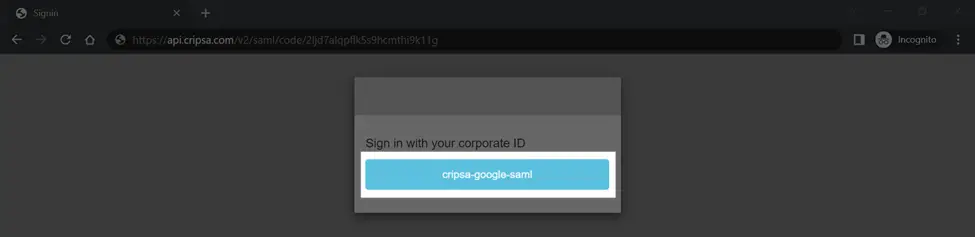
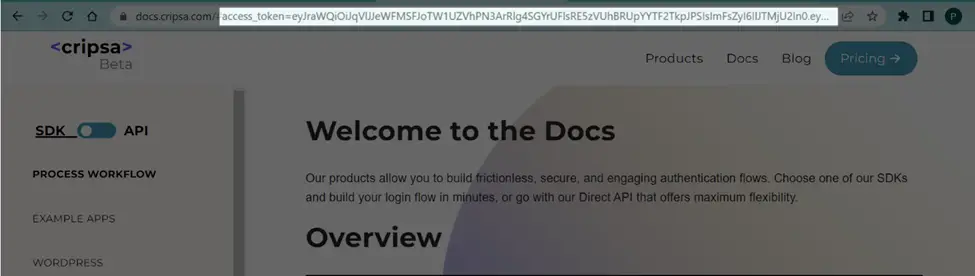
The URI got in the final response will be called as part of the Login Click Button by the Client.
For Getting the AccessToken and IdToken use Token URI.
Frequently asked questions
1. How many Registration Options available in Cripsa for SAML and what is the difference between them?
In the Register Type there are four options:
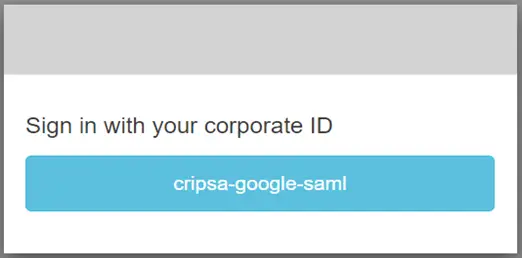
- • Registration of SAML Only
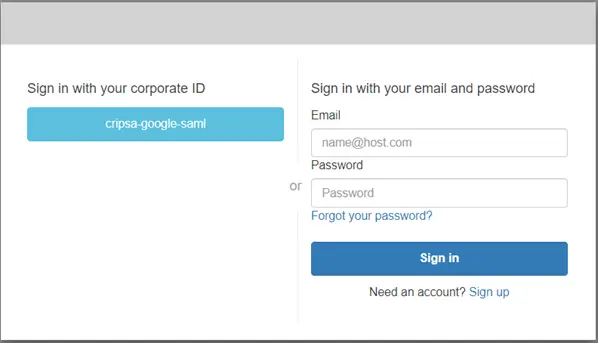
- • Registration of SAML in Separate Client
- • Registration of SAML with Other Already registered Auth Type Apps/Method with MFA
- • Registration of SAML with Other Already registered Auth Type Apps/Method without MFA
Only the Login screen would be Different for each Registration Type.
Here in the above diagram one can see MFA is available along with SAML authentication.
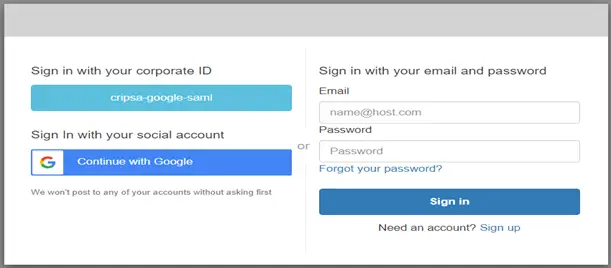
Here in the above diagram one can see MFA is available along with SAML authentication.

2. Where is the Relay State in Google SAML?
Within the Google SAML setup, there will be a field called “Start URL” which is referred to as the Relay State.